Quickbooks Online Export Chart Of Accounts To Excel
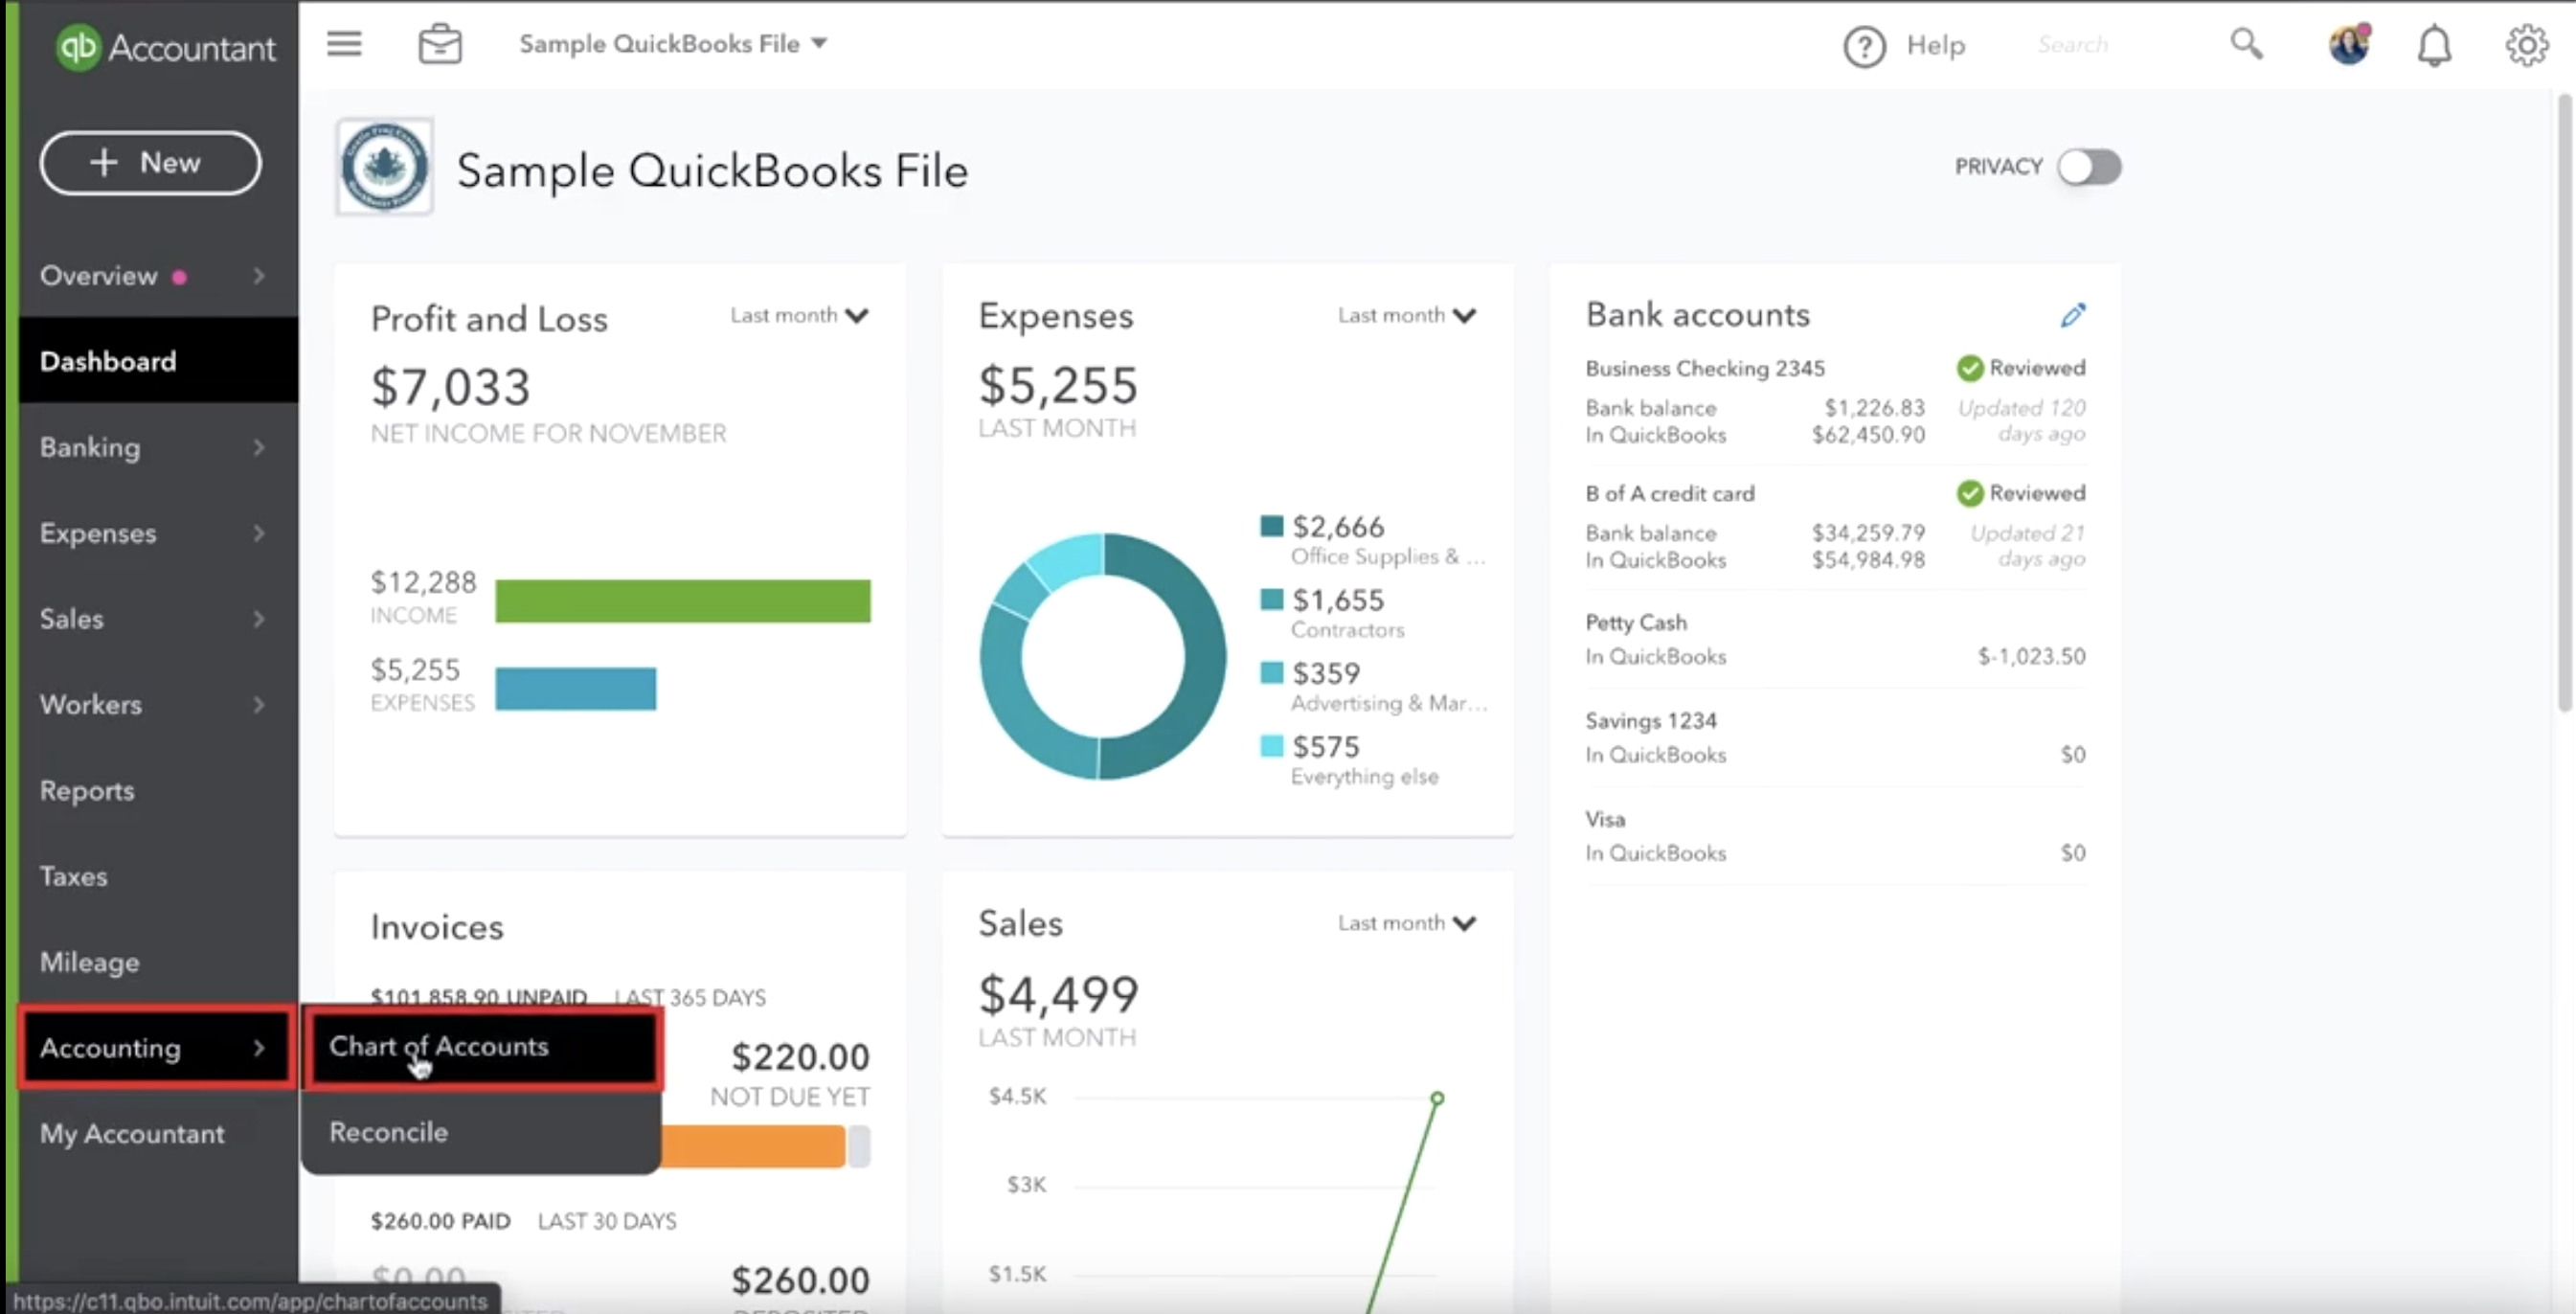
Quickbooks Online Export Chart Of Accounts To Excel - To export your report or list: Exporting the chart of accounts in quickbooks online to excel or csv format involves a straightforward process that allows users to. To export a chart of accounts, you can run an account list report and export it to excel. To do this, follow these steps: Add or remove items from. On the reports tab, set the date range.
To export a chart of accounts, you can run an account list report and export it to excel. Exporting the chart of accounts in quickbooks online to excel or csv format involves a straightforward process that allows users to. Add or remove items from. To do this, follow these steps: On the reports tab, set the date range. To export your report or list:
Add or remove items from. To export your report or list: On the reports tab, set the date range. Exporting the chart of accounts in quickbooks online to excel or csv format involves a straightforward process that allows users to. To export a chart of accounts, you can run an account list report and export it to excel. To do this, follow these steps:

How to Export a Chart of Accounts in QuickBooks Coupler.io
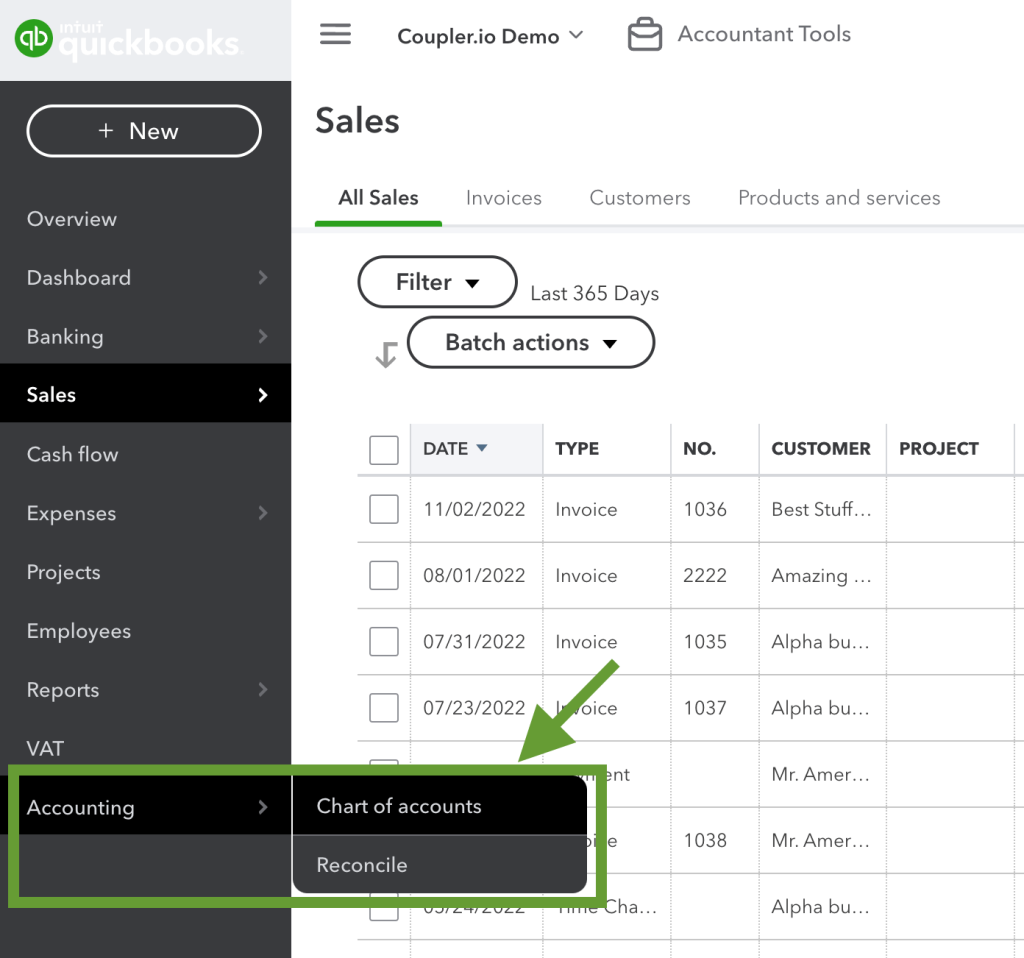
Exporting the chart of accounts in quickbooks online to excel or csv format involves a straightforward process that allows users to. To export your report or list: Add or remove items from. On the reports tab, set the date range. To do this, follow these steps:

How to Export a Chart of Accounts in QuickBooks Coupler.io
To export a chart of accounts, you can run an account list report and export it to excel. To do this, follow these steps: On the reports tab, set the date range. To export your report or list: Add or remove items from.

How to Export a Chart of Accounts in QuickBooks Coupler.io
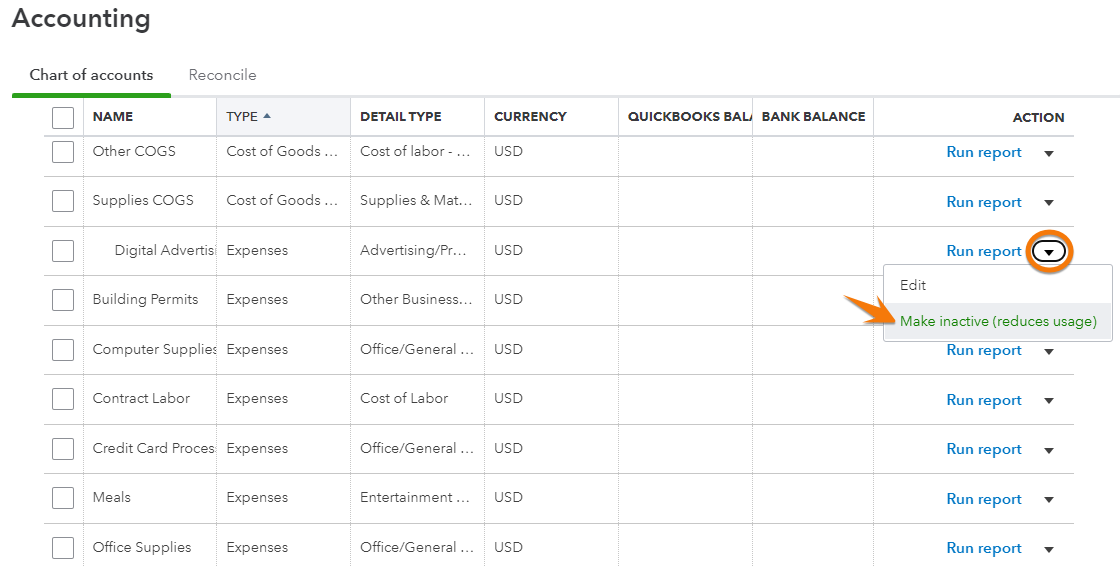
Add or remove items from. On the reports tab, set the date range. Exporting the chart of accounts in quickbooks online to excel or csv format involves a straightforward process that allows users to. To export your report or list: To export a chart of accounts, you can run an account list report and export it to excel.

How to Export QuickBooks Report to Excel Coupler.io Blog
To export your report or list: On the reports tab, set the date range. Add or remove items from. To export a chart of accounts, you can run an account list report and export it to excel. Exporting the chart of accounts in quickbooks online to excel or csv format involves a straightforward process that allows users to.

How to Export Chart of Accounts from QuickBooks Online to Excel YouTube
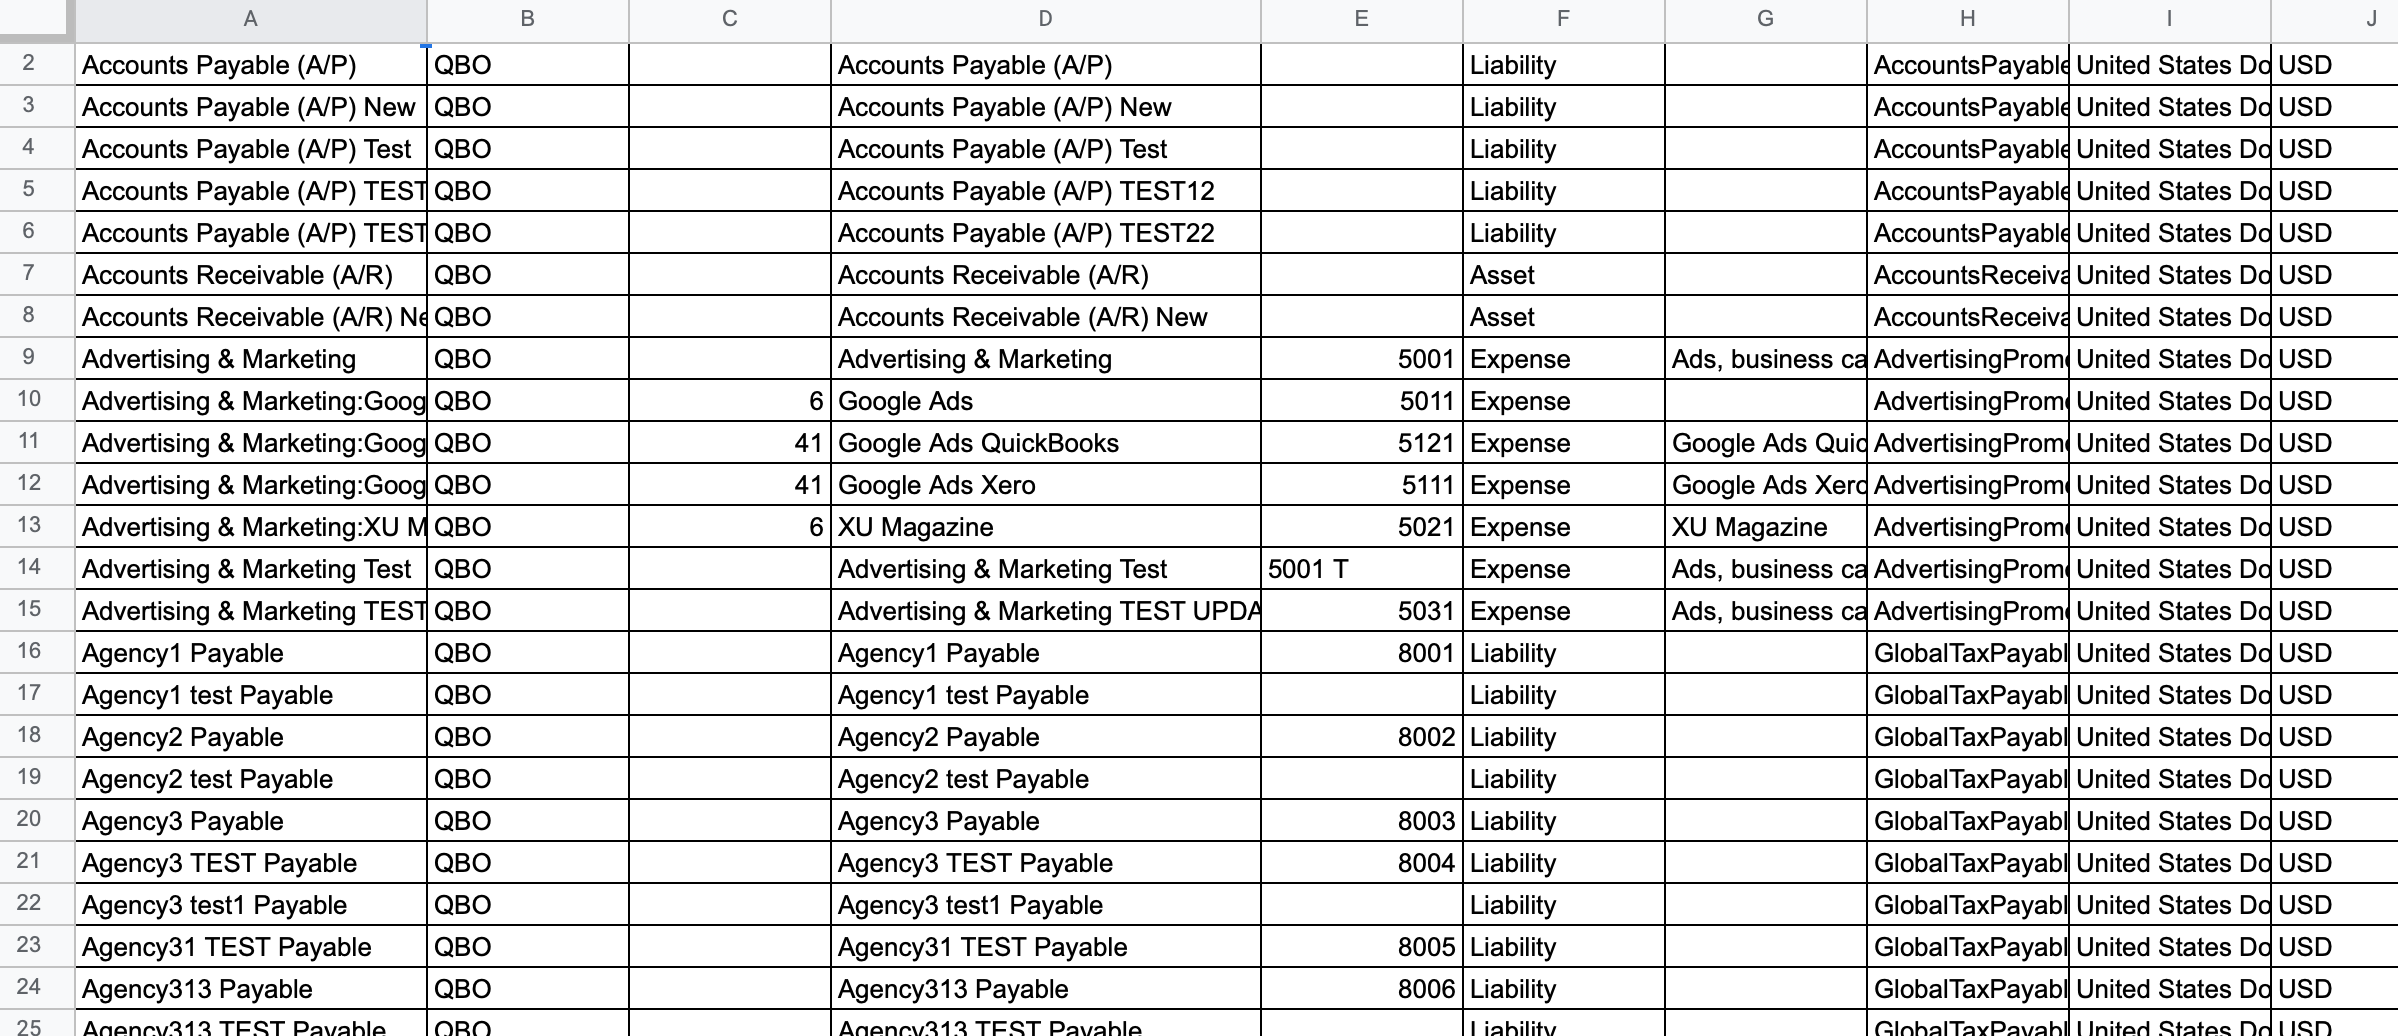
On the reports tab, set the date range. To export a chart of accounts, you can run an account list report and export it to excel. Exporting the chart of accounts in quickbooks online to excel or csv format involves a straightforward process that allows users to. To do this, follow these steps: Add or remove items from.
Export Chart Of Accounts Quickbooks
Exporting the chart of accounts in quickbooks online to excel or csv format involves a straightforward process that allows users to. Add or remove items from. On the reports tab, set the date range. To export your report or list: To export a chart of accounts, you can run an account list report and export it to excel.
Quickbooks Chart Of Accounts Excel Template
To export a chart of accounts, you can run an account list report and export it to excel. On the reports tab, set the date range. To export your report or list: To do this, follow these steps: Exporting the chart of accounts in quickbooks online to excel or csv format involves a straightforward process that allows users to.
Quickbooks Chart Of Accounts Excel Template
To export a chart of accounts, you can run an account list report and export it to excel. Exporting the chart of accounts in quickbooks online to excel or csv format involves a straightforward process that allows users to. To do this, follow these steps: Add or remove items from. On the reports tab, set the date range.

Connect Excel AddIn for QuickBooks Online with QuickBooks Online Intuit
To export your report or list: On the reports tab, set the date range. Exporting the chart of accounts in quickbooks online to excel or csv format involves a straightforward process that allows users to. Add or remove items from. To export a chart of accounts, you can run an account list report and export it to excel.
quickbooks online export chart of accounts to excel Export quickbooks
To export your report or list: To do this, follow these steps: On the reports tab, set the date range. To export a chart of accounts, you can run an account list report and export it to excel. Add or remove items from.
Add Or Remove Items From.
On the reports tab, set the date range. To export your report or list: To export a chart of accounts, you can run an account list report and export it to excel. Exporting the chart of accounts in quickbooks online to excel or csv format involves a straightforward process that allows users to.